Building a frame sauna with your own hands is a great way to create a cozy and functional space for relaxation and wellness. Frame saunas are becoming increasingly popular due to their ease of construction, cost-effectiveness, and good thermal insulation. In this article, we will take a detailed look at all the stages of building a frame sauna, from design to finishing, so you can implement your project independently.
Sauna Design
The first step in building a frame sauna is design. At this stage, you need to determine the size, layout, and appearance of your sauna. It is important to consider the number of rooms, their functionality, as well as the placement of windows and doors. You can design it yourself or use ready-made plans available online or in specialized publications.
When designing, be sure to take into account local building codes and regulations, as well as the climate conditions of your region. For example, in northern areas, more robust insulation is necessary to prevent heat loss. It is also important to consider the sauna’s location on the plot: it should be situated away from trees and other buildings to avoid shading and ensure good ventilation.
Once the design is ready, prepare an estimate listing all the necessary materials and their costs. This will help you better plan your budget and avoid unexpected expenses during construction. At this stage, you can also purchase the main materials such as wood, insulation, roofing materials, and finishing supplies.
Site Preparation
The next step is preparing the site for construction. You need to choose a suitable location on your plot, considering not only the design but also convenient access to utilities such as water and electricity. Make sure the chosen spot is not prone to flooding and is at a safe distance from pollution sources.
After selecting the location, clear the site of vegetation, debris, and stones. If there are old buildings or foundations on the site, they must be removed. Then level the surface to avoid unevenness that could affect the quality of the foundation.
It is also important to conduct a geodetic survey to determine the groundwater level and soil type. This will help you choose the right type of foundation for your sauna. Depending on the conditions, you may need a strip, columnar, or slab foundation. Choosing the correct foundation is key to the durability and stability of your structure.
Foundation
The foundation is the base of any building, and a frame sauna is no exception. Depending on the soil type and groundwater level, you can choose from several types of foundations. A strip foundation is suitable for most soil types and provides good stability. It is a concrete strip laid around the perimeter of the building.
A columnar foundation consists of individual pillars placed at the corners and intersections of walls. This type of foundation is economical and suitable for lightweight structures such as frame saunas. A slab foundation is the most reliable but also the most expensive option. It is a monolithic slab that evenly distributes the load on the ground.
After choosing the foundation type, prepare its base. This involves excavation, installing formwork and reinforcement, and then pouring concrete. It is important to ensure the foundation is level and properly cured before proceeding to the next construction stage. Typically, concrete takes several days to a week to fully dry.
Frame
Once the foundation is ready, you can begin erecting the sauna frame. The frame is a structure made of wooden beams that form the walls, floor, and roof. Softwood species like pine or spruce are typically used for the frame because they have good thermal insulation properties and resist moisture.
The first step is to install the vertical studs. They should be evenly spaced around the perimeter. It is recommended to place studs every 60 cm to ensure the necessary structural strength. After installing the studs, secure them with horizontal beams that will serve as the base for the walls and roof.
It is also important to plan for windows and doors in the frame. For this, cut appropriate openings in the studs. Don’t forget to use special reinforcements around windows and doors to provide additional structural strength. After the frame is assembled, check it for verticality and horizontality to avoid misalignment.
Insulation
Insulating the frame sauna is an important step that helps retain heat and create comfortable conditions for relaxation. Insulation is placed between the frame studs. The most popular insulation materials are mineral wool, fiberglass, and polystyrene foam.
Mineral wool has good thermal insulation and fire resistance, but it requires additional moisture protection as it can lose its properties if wet. Fiberglass also retains heat well but requires careful handling during installation because its fibers can irritate the skin. Polystyrene foam is lightweight and water-repellent, effectively insulating heat as well.
After laying the insulation, it must be covered with a vapor barrier film. This prevents moisture from penetrating the structure and protects the insulation from damage. The film should be installed with overlaps and fixed to the frame. After that, you can proceed to wall cladding.
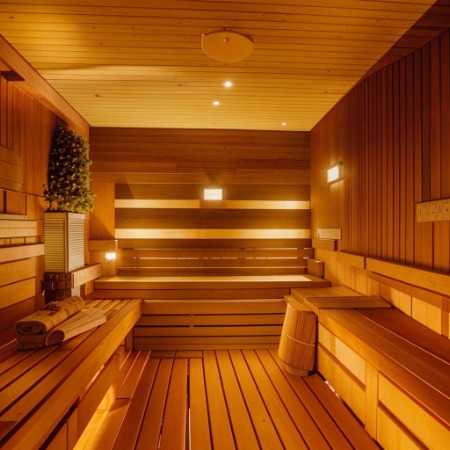
Wall Cladding
Wall cladding of the frame sauna is done using wooden panels or siding. The choice of material depends on your preferences and budget. Wooden panels give the sauna a natural and cozy look but require regular maintenance and protective treatments. Siding, on the other hand, is more resistant to external influences and requires less upkeep.
When cladding the walls, make sure the panels or siding are installed evenly and tightly. This will prevent gaps and heat loss. Start cladding from the bottom of the wall, gradually moving upward. Don’t forget to leave gaps for ventilation and possible material expansion.
After finishing the wall cladding, you can move on to finishing the interior space. Interior walls can be clad with tongue-and-groove boards, drywall, or other finishing materials according to your preferences. It is also important to plan for the installation of electrical wiring and plumbing at this stage to avoid extra costs and inconvenience later.
Roof
The roof is an important element of the frame sauna that protects against weather and provides thermal insulation. Several types of roofs can be used in frame sauna construction: single-pitch, gable, and mansard. The choice of roof type depends on your preferences and the architectural style of the sauna.
When building the roof, you need to install rafters that will serve as the base for the roofing material. Rafters should be evenly spaced along the roof’s length. After installing the rafters, lay the battens, which will support the roofing. It is also important to insulate the roof to prevent heat loss.
Various roofing materials can be used, such as metal tiles, slate, soft roofing, or natural tiles. Each material has its advantages and disadvantages, so the choice depends on your preferences and budget. After completing the roofing installation, check the joints for tightness and install a drainage system.
Finishing and Landscaping
After completing the main construction work, you can proceed to finishing and landscaping the sauna. Interior finishing can be done using various materials such as tongue-and-groove boards, drywall, or tiles. It is important to choose materials that are moisture-resistant and easy to clean.
Don’t forget to install a stove or fireplace that will provide heat in the sauna. The choice of stove depends on your preferences and budget. It is also advisable to provide ventilation to avoid excess humidity and ensure comfortable conditions for relaxation.
On the exterior, finishing can be done using siding, plaster, or wooden panels. This will not only give the sauna an attractive appearance but also protect it from weather effects. Also consider landscaping the area around the sauna: you can install paths, gazebos, or relaxation zones.
Conclusion
Building a frame sauna with your own hands is an exciting and rewarding process that allows you to create a cozy space for relaxation and wellness. By following this step-by-step guide, you can implement your project independently, taking into account all the details and features. Proper design, site preparation, material selection, and quality finishing are key factors that ensure the durability and comfort of your sauna. Don’t be afraid to experiment and add your own ideas, and your frame sauna will become a true corner of comfort and tranquility.